
How to Update Content on Amazon Vendor Central
What is Amazon Vendor Central?
Amazon Vendor Central is the web portal that 1P Sellers use to run their product listings on the Amazon retail site. Brands that use Vendor Central are exclusively 1P or First Party Sellers, meaning that instead of selling directly on amazon.com, these brands act as a supplier selling their products in bulk directly to Amazon, which distributes and sells them directly to consumers.
Even for brands in this 1P relationship with Amazon Marketing Services, there still remains a level of independence for your products, especially your customer-facing listings. Keeping your PDP (Product Detail Page) maintained with quality, SEO-researched copy is vital to both guide potential customers to your listing, as well as helping consumers find the right product to meet their needs.
This blog will follow our detailed, step-by-step instructions on how to update components of your Amazon Vendor Central, including your:
- Title
- Bullet points
- Product description copy
Navigating the complicated world of Amazon’s backend can sometimes feel overwhelming. Cryptic error messages to your Amazon contact copy and pasting the same workaround for the fourth time are just a few examples of potential issues that can arise.
Due to the complicated nature of content management and uploading on Amazon, our operations team put together a simple guide to updating content on your Product Display Pages (PDPs).
- Looking for additional help with Amazon Seller Central advertising? Check out Updating Content: Amazon Seller Central.
Updating Items Manually
If your catalog is on the smaller side, or if you’re only looking to update a product or two, manual updates are the choice for you.
- When you first log in to Vendor Central, simply click on the Item’s tab, then click Catalog.
- From there, you can scroll the list or use the search field to locate the item(s) you would like to edit. Select the product(s) from the list and click the yellow “Edit Product Details” button. You’ll be redirected to the Edit Product Details page – here you can edit both backend and consumer-facing details, like the title and bullet points.
- HEADS UP: Prior to making a manual change, have all product details on hand as you may be required to update other attributes—even if you are not planning on changing them.
- Once you’ve made your changes, scroll down to submit your changes by clicking the “Submit and Continue” button. The item is then good to go and the listing should reflect the changes shortly!
Bulk Updates with File Feeds
Most Amazon Vendor Central catalogs, however, tend to be on the larger side, calling for a far more extensive process.
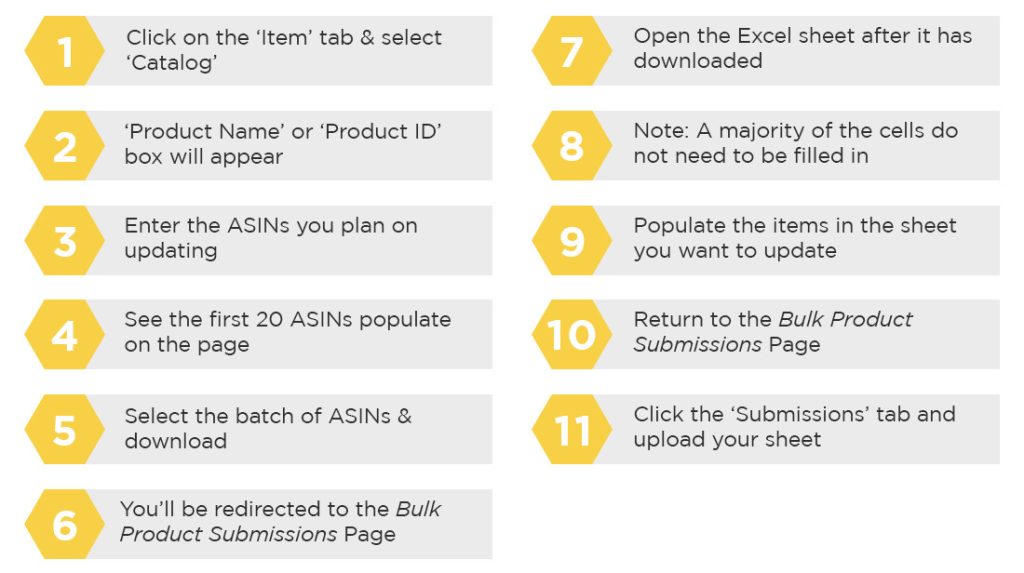
- Similar to manual uploads, when you enter the Vendor Central portal, click the Item’s tab, then click Catalog.
- Next, you’ll see a box labeled Product Name or Product ID.
- Enter the ASINs you plan on updating, then hit search.
- The first 20 ASINs will populate on the page.
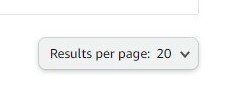
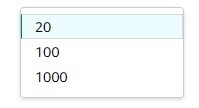
- NOTE: If you’re working on more than 20 ASINs, you will need to expand the number of items on the page. If you hit download without expanding, the generated Excel file will only display those first 20 ASINs. Pages 2 through n will not be incorporated. We don’t understand it either, but we’ve been there before and we know how annoying that realization is.
- Once you’ve selected the batch of ASINs, click the download spreadsheet icon.
- You’ll be redirected to the Bulk Product Submissions page.
- If this is your first time downloading a file feed from Vendor Central, download the generated file.
- If it’s been a while since you’ve used Vendor Central, there may be multiple downloadable file feeds on this page from previous downloads. Make sure to select the most recently downloaded file.
- Once the Excel sheet is downloaded, open the file. Most of the details should already be auto-populated (one of the many perks of Amazon Vendor Central over Seller).
- One important distinction to keep in mind: the majority of cells marked as Required need to be filled in for successful uploads; most cells marked as Conditionally Required are typically not as stringent.
- If a certain cell needs information, then a submission an error will be generated which will direct you to the cells requiring information.
- WARNING: Take caution when populating cells. If unwanted information is added to a cell by accident, you can override backend information.
- Populate the items in the spreadsheet that you want to update. Once they’re ready for upload to Amazon, save the spreadsheet and return to the Bulk Product Submissions page.
- Click the submissions tab; from there, upload the completed spreadsheet in the designated tab and then click upload.
- If there are no issues – congratulations! You’ve successfully updated your ASINs. If any issues occurred during the process, an error message will indicate the problematic ASINs and direct you to fix them.
If you receive cryptic error messages, or you are uncertain what issues are impeding your process, outside help may be required. Updating items manually, although time-consuming for larger catalogs, allows for a more careful level of customization of PDP copy than the quicker, though more complex, file feed updates. Moreover, remembering the annoying little details when using file feeds, such as adjusting the Results per Page or ensuring you don’t add information to the wrong cell, can be troublesome the first few times, but will start to become more familiar as you continue growing in Amazon Vendor Central.
But don’t worry, our team of Amazon experts is more than happy to help get your products updated ASAP. Reach out to Macarta, and let’s get started.
Does your brand actually utilize Amazon Seller Central advertising? Have no fear — check out our step-by-step post How to Update Amazon Seller Central to start getting your copy optimized today!